Setting up a Node.js server is a foundational skill for developers looking to create scalable and efficient web applications. Node.js’s event-driven, non-blocking I/O model makes it an excellent choice for server-side programming, especially for applications requiring high performance and real-time interactions. In this post, we’ll go through the essentials of setting up a Node.js server and explore its core benefits, so you can start building reliable backends for web and mobile applications.
Getting Started with Node.js Server Setup
Before diving into the server setup, it’s helpful to understand why Node.js is such a popular choice among developers. Node.js’s unique architecture, as outlined in this introduction to Node.js and its uses, enables it to handle multiple requests simultaneously, making it ideal for scalable applications.
To get started with setting up a basic server, you’ll first need to install Node.js. Once installed, follow these steps to create a simple Node.js server:
- Create a Project Directory
Begin by creating a new directory for your project. Inside this folder, initialize a new Node.js project by running:bashCopy codenpm init -yThis command sets up a basicpackage.jsonfile, which will store information about your project and its dependencies. - Install Express.js
Although Node.js provides an HTTP module, using Express.js—one of the most popular Node.js frameworks—simplifies the process of setting up routes, handling requests, and managing middleware. To install Express, run:npm install express - Create Your Server File
Next, create aserver.jsfile in your project directory and add the following code:const express = require('express'); const app = express(); const PORT = process.env.PORT || 3000; app.get('/', (req, res) => { res.send('Hello, World! This is your Node.js server up and running!'); }); app.listen(PORT, () => { console.log(`Server is running on port ${PORT}`); });
This script sets up a basic server that listens on port 3000 and responds with “Hello, World!” when accessed at the root URL (/). - Start Your Server
Now that your server file is ready, you can start it by running:bashCopy codenode server.jsOpen your browser and go tohttp://localhost:3000to see your server in action!
“Node.js allows developers to use JavaScript for both client and server-side programming, creating a seamless development experience.”
Setting Up a Basic API Endpoint
Once your server is running, you may want to add API routes to handle data requests and responses. This setup becomes especially valuable when you’re building RESTful APIs. For a comprehensive guide on building more complex APIs, this article on building a simple API with MongoDB and Express is a helpful resource.
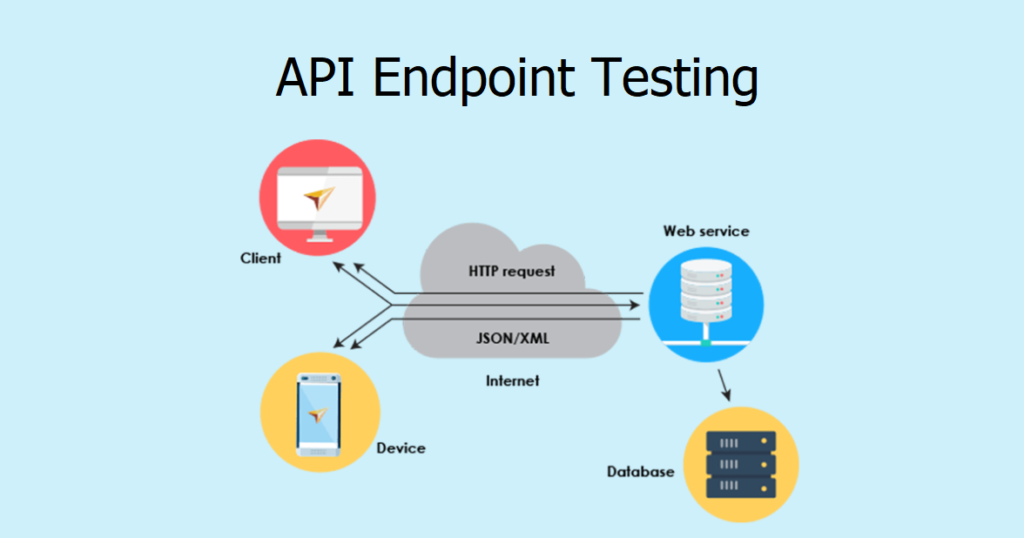
To add an API route, you can modify your server.js file to include a new endpoint:
javascriptCopy codeapp.get('/api/greeting', (req, res) => {
    res.json({ message: 'Hello from the API!' });
});
This additional route provides a JSON response, making it a simple yet effective API endpoint.
Deploying Your Node.js Server
After developing a Node.js server locally, the next step is deployment, which allows your application to be accessible online. Platforms like Heroku and Vercel make it easy to deploy Node.js applications. These services handle scaling, environment management, and domain configuration, enabling you to focus more on development. You can find a detailed tutorial on deploying Node.js applications on these platforms in this article about deploying a full-stack application on platforms like Heroku and Vercel.
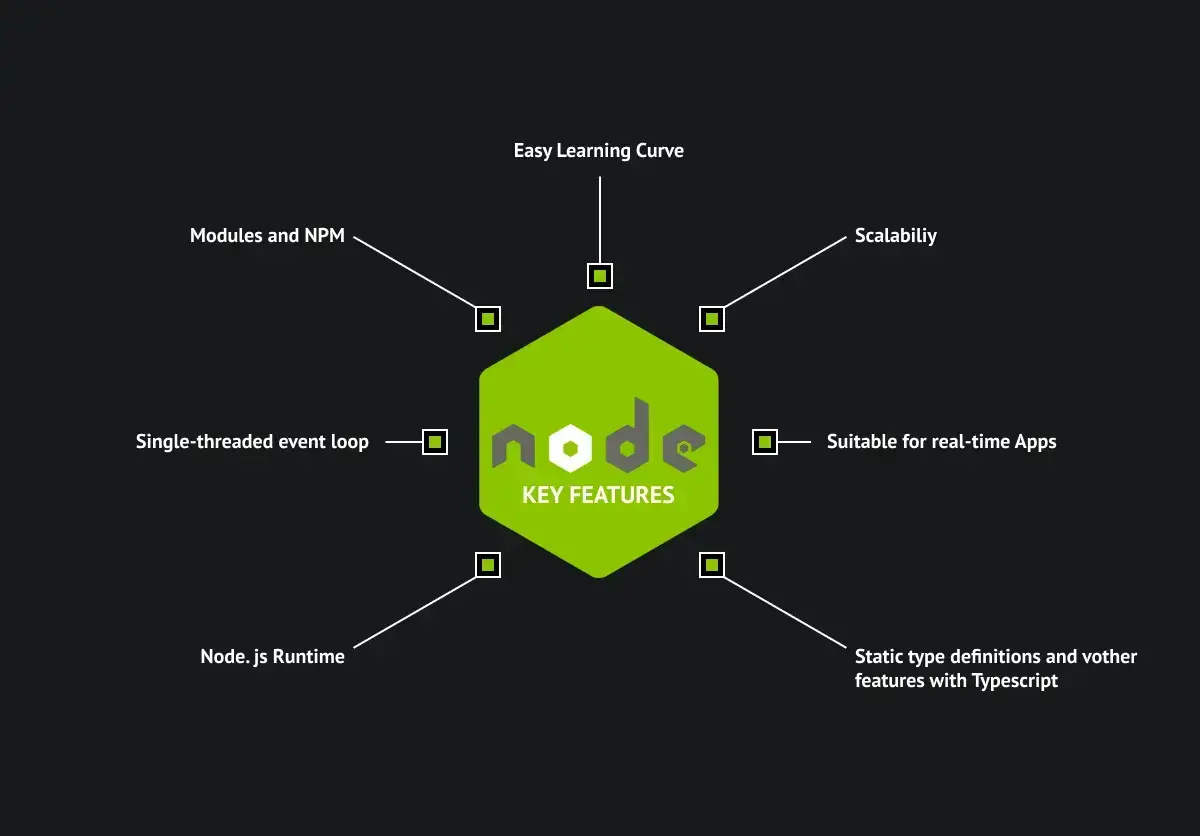
Benefits of Using Node.js for Servers
Node.js’s single-threaded architecture, asynchronous processing, and fast execution speed make it an ideal choice for scalable applications. Its extensive library of modules simplifies complex server functions, allowing developers to add features like file handling, database access, and data encryption with ease.
Moreover, the popularity of JavaScript, combined with the flexibility of Node.js, allows developers to create full-stack applications using a single programming language. This unified approach not only speeds up development time but also makes it easier to maintain and scale applications over time.
In Conclusion
Setting up a Node.js server is a straightforward process that empowers developers to create robust, scalable backend solutions. From creating basic server functions to setting up API endpoints, Node.js offers everything needed to build and deploy modern web applications. As you continue to work with Node.js, exploring deployment options and expanding server capabilities will help you build applications that are efficient, responsive, and equipped to handle real-world demands.